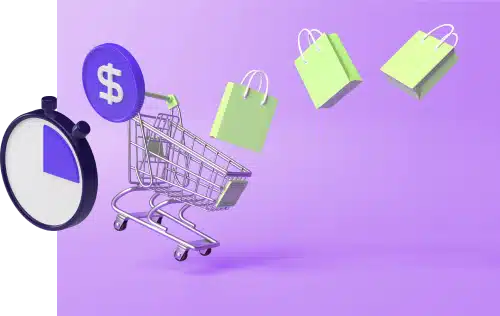
Your driver Uber Eats app provides everything you need to complete deliveries without a hitch.
But despite its intuitive interface and advanced trip tools, you may still have some questions about how to use the app effectively as a new delivery driver.
We’ll break down the app and its many features to help you step into this world.
How to Use the Uber Eats Driver App
After downloading the app from Google Play or the App Store, follow these easy steps:
STEP 1: Sign Up
If you haven’t already, sign up for Uber Eats either using the app directly or the desktop version. You can also use an existing Uber account.
Here’s a step-by-step guide on becoming an Uber Eats driver and the sign-up process.
STEP 2: Opting for Uber Eats Requests
You have to opt in to receive food delivery requests since the Uber Eats Driver app is used by both rideshare and delivery drivers. To do that:
- Tap on the three bars on the top left. That’s the menu.
- Tap “Help.”
- Choose “A Guide to Driving and Delivering.”
- Navigate to “Receiving Requests.”
- Tap “I want to choose which types of trip or delivery requests I receive.”
- Scroll down and choose “Opt in to deliver with Uber Eats,” picking your region in the process.
- Follow the instructions provided.
It should take a few hours before you start seeing Uber Eats requests, so be patient. It’s a good idea to verify your delivery preferences too:
- Tap the two toggle icons on the bottom left corner.
- Ensure the “Deliveries” box is ticked.
- Play around with trip filters to adjust potential requests to your liking.
Once you’re back to the home screen, note that:
- It primarily displays the map. That’s where you’ll see nearby hotspots and your location and navigate your deliveries.
- The blue “Go” button lets you go online and start accepting requests. To go offline, tap it again.
- The top left icon is the menu. There, you can access your account and payment settings, your earnings, trip management tools, and more.
- Tapping the top middle button will reveal your earnings for the day, showing you the number of trips you completed and the option to view your weekly summary. Swiping to the right will reveal your earnings on the last trip.
How to Complete an Uber Eats Delivery
Once you’re ready to start taking requests, tap the blue “Go” button to go online. Then, the actual process will look like this:
STEP 1: Receiving a Delivery Request
When you receive a request, you’ll have 15 seconds to accept or decline it. A pop-up menu will show up, revealing:
- The delivery’s value, including the expected tip.
- The estimated distance from the restaurant to the drop-off location.
- The restaurant and drop-off addresses.
STEP 2: Accepting a Delivery Request
To accept a delivery, tap the green “Delivery” button. To decline it, tap the “X” button or wait until 15 seconds pass.
Once you accept a delivery request, the map will switch to GPS navigation mode. Swipe the time and mileage prompt up to receive some more information:
- Special instructions you must abide by
- The order number
- The restaurant and the customer’s names
- Options to contact the former and Uber
STEP 3: Picking Up the Order
Head to the restaurant, making sure you memorized the order number. When you arrive:
- Double-check that the order contains everything the customer requested and that it’s theirs.
- Ensure that the order contains drinks if the customer ordered them.
- Check whether the order includes utensils and napkins. If not, request them. Ensuring customer convenience is good for your rating.
- Be sure to communicate any delays with the customer to improve their delivery experience.
- Tap “Confirm pickup” when you pick up the order.
STEP 4: Dropping Off the Order
Once you arrive at the delivery destination, make sure you abide by the customer’s instructions (e.g., leave at the door). It’s a good idea to message them beforehand to let them know their food is about to be dropped off.
Finally, take a photo to submit as proof of completing the delivery, then tap on “Delivered” to wrap up. You’ll see your earnings afterward, as well as begin to accept new delivery orders.
Note that tips from your last delivery will kick in after about an hour, so don’t fret if the amount you initially see doesn’t match the one you accepted during the delivery offer.
How to Cancel an Uber Eats Delivery
If you have to cancel a delivery, tap the exclamation point on the bottom left corner of the delivery info and pick one of the listed reasons.
If you cancel before picking up the order, it’ll be assigned to a different driver. Otherwise, it’ll increase your cancellation rate. Keep your cancellation rate as low as possible to avoid having your account deactivated.
Breaking Down the Uber Driver App Features
The Uber app comes with several nifty features, including:
1. Safety Provisions
The app has an Emergency Button in the Safety Toolkit that lets you contact 911; it shows your live location, vehicle information, and license plate number.
2. Destination Filter
Whenever you set a driver destination in the app, Uber Eats tries to match you with delivery requests along that route. This can be useful when heading home and only wanting to take delivery requests along your route.
How many destinations you can set depends on your level of Uber Pro; some drivers can set up to four destinations daily.
3. Driver Onboarding
The app has several features to help you quickly get in tune with using the app. An extensive help section provides valuable information about working for Uber Eats and using the app.
There’s also an in-app learning center with tutorial videos showing how to use it.
4. Earnings
To view the comprehensive breakdown of your earnings on the app:
- Launch the app
- Open the driver menu
- Click on “Earnings.”
Understanding how the fares add up is essential so you know how to make your gigs more profitable. You can earn more money on Uber Eats through referrals, promotions, and boosts.
5. Driver Ratings
Driver ratings help you understand what your customers think of your services and affect how the Uber Eats algorithm sees you as a delivery driver.
If you’re a new Uber Eats driver, you won’t be able to view your ratings on the app until you’ve completed a delivery.
To check your ratings:
- Launch the app
- Open the menu
- Click on your profile picture
- Select the rating icon beneath your name
7. Uber Plus Card
The Uber Plus card is a prepaid debit card that lets Uber Eats delivery gig workers pay for orders at non-partnered restaurants on behalf of customers.
To activate the Plus Card:
- Launch the mobile app
- Go to “Account”
- Click on “Plus Card”
- Enter the 16-digit number behind the card
Unlike the Lyft Driver app’s GPS, which can be prone to recommending wrong routes, the Uber Eats driver app is reliable. The in-app navigation tools include:
- Google Maps
- Waze
- Apple Maps
- Uber Navigation
9. Support
While the Uber Driver app has more than one dedicated section to guides and tutorials on how to use it, you can still reach out directly to support if you get stuck.
To reach out to support:
- Open the driver app menu.
- Click on “Help” in the driver app.
- Navigate to the category of issue you’re experiencing.
You may also access the Greenlight Hub option if you want in-person support on issues related to driving for Uber. The service is available in several major cities nationwide, including Atlanta, Los Angeles, and Orlando.
10. Opportunities
“Opportunities” is what Uber calls its infographics feature that lets delivery drivers determine the best times and places to drive based on ongoing local events such as concerts and sports events.
You can access this feature by opening the menu from at the top left-hand corner of the screen.
Wrapping Up
If you’re already an Uber driver, all you need to do is enable deliveries in your preferences in the app. As a new driver, you’ll have to fulfill the standard requirements before you can get on board.
Remember that your ratings contribute heavily to your status as an Uber Eats delivery driver, so whether you complete gigs by car, bicycle, or on foot, ensure you prioritize providing a good service!