Pyrography is the art of decorating wood by burning designs into it. As a beginner in this craft, you should know something about the basics before you pick out your wood and decide on your designs. But where to begin?
How should you get started with pyrography? To start in pyrography or wood-burning, you will need to learn how to do the following things:
- Gather the right supplies
- Choose and prepare your wood
- Choose and create a design
- Burn the design
There is a lot to learn in each of these steps to help you understand how to do pyrography. Once you know more, you will be able to be ready to begin on your first wood burning project.
Gathering the Right Supplies
You do not need a lot of tools or supplies for pyrography. The following list shows the basic things you will need:
- Wood burning pen
- Carbon or graphite paper
- Printed design
- Tape
- Sandpaper
If you choose to use a physical stencil, you won’t need the paper, printed designs, or tape. We share some of our favorite stencils, here.
We’ll explain each of these tools and supplies, and then how to use them to create the design patterns on your wood.
Getting to Know the Wood Burning Pen Tool
A wood-burning pen or wood burner has a simple design, similar to a soldering iron. The handle is designed to stay cool while you hold the tool, and the best pens have heat-resistant handles.
The pen has a metal element that heats up. You attach different tips to your pen, depending on what kind of lines and designs you want.
Because you are working with a tool that becomes extremely hot, the wood burner has some safety features. The pen has a barrier between the handle and the metal to help prevent you from burning your fingers as you work.
Wood burners also usually come with a metal stand that you put the tool on to prevent burning your work surface and avoid a potential fire hazard.
You can buy wood pens online, in hobby stores and at woodworking shops. They are quite easy to find. They usually come in kits that include multiple tips and other accessories, such as stencils.
To use the wood burner, you hold it in a similar way to how you hold a regular pen or pencil. However, you must keep your fingers above the guard so that you don’t burn your fingers. As you use the tool more, you will start to find the grip that is most comfortable for you.
Wood burners range in price from under $20 to hundreds of dollars. The cheapest options usually do not have a temperature control option, which means you can only turn them off or on. You cannot regulate the heat.
The other option is one with temperature control, which allows you to control the exact burning temperature. You will pay a little more for them, with the lower end options being around $40.
Temperature Control vs. No Temperature Control
| With Temperature Control | No Temperature Control |
| Cost more | Very inexpensive |
| More control over the burn | One temperature requires more skill |
| Easier for a beginner to use | Requires a lot of trial and error |
Here’s a popular wood-burning pen with temperature control:
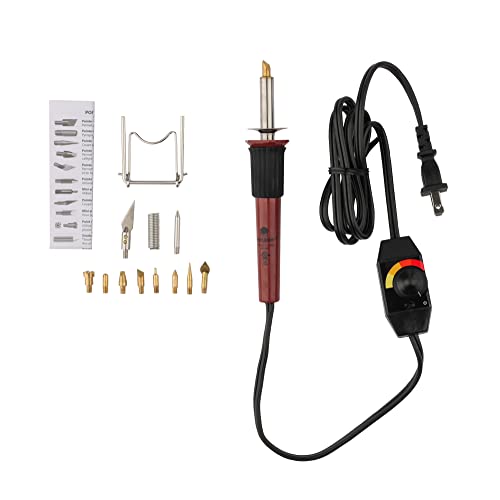
- Wood burning tool with variable temperature control and 11 points: Cone Point; Shading Point...
- Tool features a comfort grip for extended use and a stand to protect your worksurface from heat
Most experts agree that if you are going to spend a little more, do so on temperature control for the pen. It makes it easier to learn the craft if softwood on how hot the pen is.
Talking About Different Burning Tips
Let’s take a moment to talk a little more about tips. The tips that come with your wood burner or that you purchase separately play a very important role in pyrography.
The tips are what allow you to create different lines and patterns on the wood.
The tip screws or snaps into the end of your wood-burning pen. They are always metal, and each has its own distinct design or shape. Some tips will even burn letters, like a brand, which can make creating letters simple.
These are some of the most common tips and their use:
| Tip Name | Use |
| Shading | Shading or branding a teardrop |
| Dot | Dots, holes, fine lines |
| Calligraphy | Writing, fine lines |
| Groove | Gouges and grooves |
| Branding | Specific patterns depending on tip design |
| Universal | Variety of lines |
Selecting the Wood
The next step of preparation before you begin your woodworking project is to choose your wood. You can pretty much use any type of wood, but some are better for beginners than others.
- Ideally, you want a soft wood with minimal grain. A light color wood is best as it will allow the burning to show up nicely, whereas a darker wood will make it harder to see your art. The best choices include poplar, birchwood and basswood.
- You can use hardwood, but it is more difficult to burn and will require higher heat. You can expect to spend more time working with a hard wood over a soft wood. This might not be an ideal starter wood.
- You can also use scrap wood, but never use wood that has a finish on it. This creates a health hazard when you start burning.
This is probably going to be the most expensive supply you need because you need to have a new piece for each project. However, you might be able to find wood for free in nature or get cheap scrap pieces from a lumber yard.
You can save money, especially early on, by using smaller pieces of thinner wood bought in bulk.
These bulk, unfinished wood packs are very popular with beginners:

- 50Pcs Wood Pieces Set - 4x4 wood squares blank unfinished wood sheets, thickness: 1/8...
- Unfinished Wood Crafts - High quality basswood boards, Sturdy, durable, eco-friendly and no...

- Unfinished Wooden Circles: Use these wooden circles for crafts, wood burning projects, Easter...
- Multi-Purpose: Our 6 inch wood circles can be engraved, sanded, and stained to create...

- 3MM 1/8" x 5-13/16" x 5-13/16" (blade kerf) Baltic Birch Plywood - B/BB Grade (Pack of 12)
- Material : Baltic Birch Plywood - B/BB Grade.

- Material: Natural pine. Color: wood color
- Diameter: 10-12cm. Thickness: 1cm.
Preparing the Wood
You shouldn’t try to start burning on a piece of wood until you prep it. Prepping your wood allows you to get a smooth and even surface upon which to work. This makes it much easier to create good lines.
Preparing your wood just involves sanding it down. You want to continue sanding until it is smooth.
Fox Chapel Publishing suggests that you progressively change to a finer grit of sandpaper as you work. This way, each finer grit getting rid of scratches from the previous grit. Check out their website for more details.
If you want, you can alter the grain when sanding if you feel that will work better for your project. Keep in mind that it is easier to burn with the grain, so you want the grain to run the direction of the most lines in your design.
Remember, you should never use finished wood. But if you have a piece that had paint on it, you may be able to use it if you sand off all the paint.
If you bought prepared wood from a hobby shop or craft store, then you can skip this step because it will already be smooth. Also, there should not be a grain issue to worry about.
Choosing Your Design
Before you can start on your wood-burning project, you need to decide what you would like to create. Pyrography designs are readily available for free or for purchase.
Free Pyrography Designs
These sites offer free and printable woodburning designs:
- Mostcraft – 22 designs
- Homesthetics – 28+ designs
- GuidePatterns – 27 designs
Books with Pyrography Designs
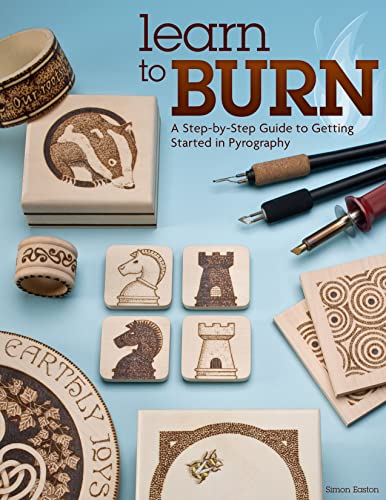
- Fox Chapel Publishing Learn To Burn Book- A Step-by-Step Guide to Getting Started in...
- Learn to "write with fire" along with all the basics of woodburning, purchasing tools, materials...
You can also create your own patterns. You can draw them freehand if you are good at that sort of thing. You can create them on a computer or even copy a picture to use as your design.
For these types of designs, you will print them off or remove them from the pattern book, and then use graphite or carbon paper to transfer them onto the wood.
Here are the steps you will follow to do this:
- Tape graphite or carbon paper (200-pack!) to your wood
- Tape the design paper on top of the graphite paper
- Using a pen or tool, trace the lines of the design
- Remove both papers
One note: The graphite paper has a darker side and lighter side. The darker side goes against the wood so that it will transfer the graphite onto the wood.
You will need to use a little pressure to transfer the design, so do not be afraid to push down. However, be careful when choosing a tool because you don’t want something sharp that will tear the paper and complicate the tracing process or damage the wood.
Another option for creating your design is to use stencils as you use for other crafts. You will need to trace the stencil onto your wood using a regular pencil. Do not try to hold the stencil and burn it. This may damage the stencil and could lead to burns on your hands.
When choosing your first design, stick with something simple and basic. Black and white designs are best because they do not require shading, which is a more advanced skill. Also, make sure the size of the pattern fits your wood piece.
Burning the Design
Now that you have all your supplies and have chosen your wood, prepped it, and transferred a design onto it, you are ready to start burning. You should turn on your wood burner and, if you have a temperature control, set it to the proper temperature.
The type of wood you are using will determine the temperature setting to use. Softer wood requires lower heat, while harder wood requires higher heat. The exact temperature setting you need varies depending on the wood burner you use, so you will have to test it out to find what is best for the wood you are using.
Before you start on your project, you may want to practice on a scrap piece of wood. You can test the temperature setting. This also will let you see how it feels to use the wood burner so that you are able to play around with how fast you move the pen and how much pressure you use.
It also gives you a chance to make mistakes. It is better to make a mistake or do something wrong on a scrap piece of wood than to do it on your project piece.
Once you are ready to begin your project, the first step is tracing the lines in the design. At this point, you just want to go over all the lines. Do not worry about filling in or adding shading if your design has shading.
Holding the pen firmly, you want to guide it slowly over the wood. Keep your hand steady and keep moving for the best results. The longer you hold the wood burner in one spot, the deeper and darker that spot will become. Since you want your lines to be smooth and even, going slowly will help you to avoid gouges, deep grooves and lines that are too thick or too dark.
After you get all the lines traced, you can begin filling in or adding shading and other details. Again, keep your hand steady and work slowly. Shading is an advanced skill that goes beyond the scope of this article, but you can learn more about it here.
If you learn better by watching someone demonstrate, then you might find this video helpful as you start your first pyrography project.
Tips to Help Make Your First Pyrography Project Successful
You know the basics of how to start on your first wood burning project. Now, it is time to learn a few tips and tricks that can help you become better at this craft.
Tips on Tips
You are now aware of how important the tips on your wood burner are, so you can understand the importance of keeping them in good condition. You should wipe your tips off as needed while you work and always clean them after you finish a project.
You will know your tip needs to be cleaned when it starts getting a black build-up on it. This build-up is carbon, and it is a natural byproduct of burning wood. Never try to burn it off by turning up the heat on your wood burner because this will wear out the tips faster.
To avoid bending, cracking, or breaking your tips, when you remove them from the wood burner, let them cool completely in a fireproof dish and then store them in a box or somewhere secure. Also, always use pliers to remove tips and to put new tips on a hot tool to avoid burns.
You should also know that a new tip will require a higher temperature than an old tip. This is because old tips get hotter.
Tips While Working
As you work on a project, always keep safety in mind. The end of the tool and the tips get extremely hot. The temperature can get up to several hundred degrees. Make sure the end is not leaning on or touching anything that could burn.
Work on a fire-resistant surface at all times and follow all the safety instructions that come with your wood-burning pen. Consider adding a small fan to your work area to help remove the smoke as you work. This will help you avoid lung irritation. Do note that if your pen is smoking excessively, then it is too hot, so you need to turn it off and let it cool or adjust the temperature.
One helpful tip for choosing wood is that you might want to avoid pine. While it is a soft wood and looks nice, it contains a high amount of resin. This can bubble up when heated and make your work surface and wood burner sticky.
When drawing your designs on the wood, always use a regular pencil. This makes it easier to erase lines, and it will burn up as you work. Never use colored pencils because they contain wax that will melt when you burn over the lines.
As for the eraser, you should opt for a white artist’s eraser. Normal pink erasers will sometimes leave behind a residue that stains your wood.
A great tip for any project is to get two pieces of wood and use one of them as your practice canvas, as mentioned above. If you don’t want to do this with every project, it is a good idea to at least do this whenever you work with a new type of wood or new tips since changes in your tools and supplies will require changing how you work.
Tips for Finishing Your Piece
Once you finish your project, you can stain it or add paint to elevate the final look. If you want to paint your project, you can do this instead of shading. Burn the outline of your design and leave the inside areas undone so that you can paint them.
What’s Your First Project?
Pyrography means fire writing, which is a wonderful name for this craft. People have long used this practice to decorate wood and other various materials, such as leather and clay.
Early uses were often to decorate an item or to personalize it for ownership identification. However, you will be able to be much more artistic with the tools that are now available.
Now that you know the basics of wood-burning, you can start on your first project. Find the right piece of wood and the perfect pattern to showcase your fire writing skills.
Image Credit: dupo-x-y